Introduction
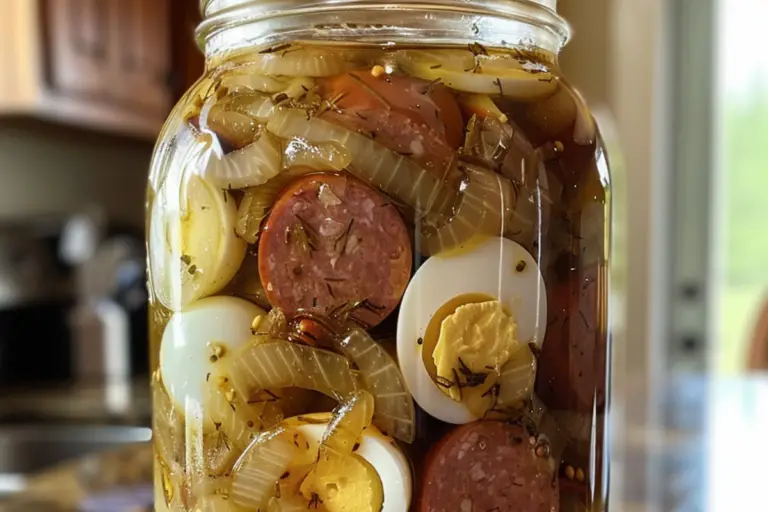
Pickled kielbasa, eggs, and onions are a tangy and savory treat that’s perfect for snacking or serving as an appetizer. This guide will show you how to make this delicious combination using simple ingredients and straightforward methods. Pickling not only enhances the flavors but also extends the shelf life of these ingredients, making it a practical and tasty option.
Whether you’re planning a party, looking for a unique addition to your snack repertoire, or simply want to try something new, pickled kielbasa, eggs, and onions are an excellent choice. This recipe is easy to follow and allows you to customize the flavors to your liking. Let’s get started on this flavorful journey.
What You’ll Need
Detailed measurements ingredients in the section below
Equipment
- Large pot
- Sterilized glass jars with lids
- Measuring cups and spoons
- Ladle
- Tongs
Additional Tips for Success
Before you begin, ensure all your equipment, especially the jars and lids, are properly sterilized. This step is crucial to prevent any contamination and to ensure the long-term preservation of your pickled kielbasa, eggs, and onions. Additionally, use fresh and high-quality ingredients for the best results. The balance of vinegar, spices, and the natural flavors of the kielbasa and onions will create a harmonious blend that is both tangy and savory.
Ingredients
- 1 pound kielbasa sausage, cut into 1-inch pieces
- 6 hard-boiled eggs, peeled
- 2 large onions, thinly sliced
- 2 cups white vinegar
- 1 cup water
- 1/2 cup sugar
- 1 tablespoon salt
- 2 cloves garlic, smashed
- 1 tablespoon mustard seeds
- 1 teaspoon black peppercorns
- 1 teaspoon dill seeds
- 1 bay leaf
Instructions
Sterilize the Jars and Lids
- Boil jars and lids in water for 10 minutes to sterilize them. This step is crucial to prevent any bacterial contamination and to ensure the longevity of your pickled ingredients.
Prepare the Brine
- In a large pot, combine the white vinegar, water, sugar, salt, smashed garlic, mustard seeds, black peppercorns, dill seeds, and bay leaf.
- Bring the mixture to a boil, stirring until the sugar and salt are dissolved. This brine will be the flavorful base for your pickled kielbasa, eggs, and onions.
Prepare the Ingredients
- Cut the kielbasa sausage into 1-inch pieces, peel the hard-boiled eggs, and thinly slice the onions.
- Ensure all ingredients are ready before you begin packing the jars.
Pack the Jars
- Layer the kielbasa pieces, hard-boiled eggs, and sliced onions into sterilized jars, ensuring even distribution. This helps in consistent flavor absorption.
- Pour the hot brine over the packed ingredients, ensuring they are fully submerged. Leave about 1/2 inch of headspace at the top of each jar.
Seal the Jars
- Wipe the rims of the jars clean and place the lids on. Screw on the bands until they are fingertip-tight. This helps to create a proper seal during the boiling water bath process.
Process the Jars
- Process the jars in a boiling water bath for 10 minutes, ensuring they are fully submerged. Maintain a gentle boil throughout the process to ensure proper sealing and preservation.
- Carefully remove the jars from the water bath and let them cool to room temperature. Check that the lids have sealed properly.
Cool and Store
- Store the jars in a cool, dark place. This helps in extending the shelf life and maintaining the flavor quality of the pickled ingredients.
Allow Flavors to Develop
- Allow the pickled kielbasa, eggs, and onions to sit for at least a week before consuming to let the flavors meld. The wait is worth it as the ingredients absorb the tangy brine and develop a deeper flavor.
Conservation
Storage Tips
Store unopened jars in a cool, dark place for up to several months. Once opened, refrigerate and consume within a few weeks. Ensure the ingredients remain submerged in the brine to prevent spoilage. Always use clean utensils when handling the pickled items to maintain their quality.
Serving & Variations
Serving Suggestions
Serve pickled kielbasa, eggs, and onions as a tangy appetizer or snack. They pair well with crackers, bread, or as part of a charcuterie board. The combination of savory sausage, tangy onions, and flavorful eggs is sure to be a hit at any gathering.
Spicy Pickled Kielbasa
Add more red pepper flakes or sliced jalapenos to the brine for extra heat. This variation will give your pickled treats a spicy kick that complements the savory flavors.
FAQs
How long do pickled kielbasa, eggs, and onions last in the refrigerator?
Pickled kielbasa, eggs, and onions can last up to several months when stored in a cool, dark place. Once opened, they should be refrigerated and consumed within a few weeks to ensure the best flavor and texture.
Can I use a different type of vinegar for pickling?
Yes, you can experiment with apple cider vinegar or rice vinegar for a different flavor profile. Each type of vinegar will add its unique taste to the pickling brine.
What other spices can I add to the pickling liquid?
You can add spices like cloves, allspice, or bay leaves for additional depth of flavor. These spices will complement the existing ingredients and enhance the overall taste.
How should I serve pickled kielbasa, eggs, and onions?
Serve them as a tangy appetizer or snack, paired with crackers, bread, or fresh vegetables. They also make a great addition to sandwiches, salads, and charcuterie boards.
Conclusion
Pickled kielbasa, eggs, and onions are a delicious and easy-to-make treat that adds a tangy flavor to any meal. Whether you prefer them spicy, sweet, or herb-infused, this versatile recipe can be tailored to your taste. Enjoy this delightful snack that’s sure to be a hit at your next gathering or as a tasty addition to your everyday meals.
Meat shouldn’t be water bath canned and should be pressure canned as it is unsafe to can meat by water bath. Has it been done for centuries, sure, but it is still unsafe. Do the eggs get overdone or rubbery with pressure canning?
Great question! When pressure canning, the eggs can become a bit rubbery due to the higher temperatures and longer processing times. To maintain the best texture, you might consider keeping the eggs refrigerated and consuming them within a few weeks instead of pressure canning. Have you tried pressure canning other types of meat before?